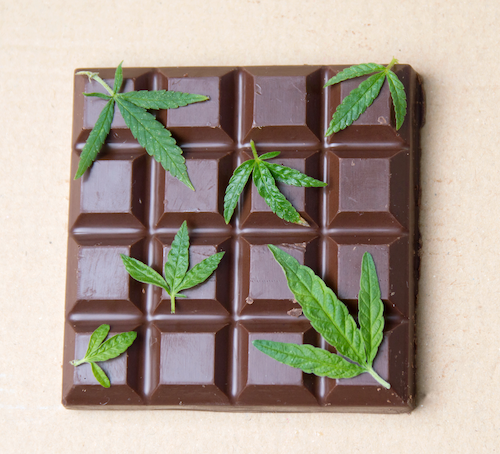
If you love anything chocolate, then you are going to fall for our Top 5 Cannabis Chocolate Lovers Recipes.
Where are all of my cannabis chocolate connaisseurs at? The ones who love chocolate everything and anything, and the ones who love infusing weed into every little chocolate thing they can think of?
This Article Is For YOU, Chocolate Lovers!
So what is it about chocolate? Why is it so darn good? Besides the goodness of it, it masks a lot of other tastes and that’s also wonderful.
If you’re not a fan of the taste of Cannabis oils, chocolate’s rich and robust taste literally, takes the cake.
You’ll need a few things to get started, and a few edibles pre-made so here’s your list, get going!
Cannabis Butter
A lot of cannabis-infused chocolate recipes use cannabutter, so then it’s important to know how to make it!
Freeze your batches so you always have weed butter ready.
A recipe on how to make cannabis butter at home. After many cannabutter recipes, we find that this is by far the best way to infuse weed with butter.
Decarboxylate your weed by spreading your cannabis evenly on an oven tray And coat with aluminum foil.
Place in the oven on 240F/115C for 25 till 45 minutes, and then let it cool.
Grind your dry cannabis or chop it till fine.
Place the cannabis in a strong mason jar, add butter and (1 tsp of sunflower lecithin)(optional)
Place your closed jar in cold water and let it come to a boil, Boil for 2 to 3 hours.
Strain your butter through a cheesecloth.
Cool down
Now you can use the Cannabis Butter (Cannabutter)
Video
Notes
If using a mason jar, be sure to start with cold water. Furthermore, it is imperative to let the water cool gradually so that your glass will not shatter.The video guide might be slightly different than the blog recipe. The blog recipe is the most updated and accurate.
Another important ingredient when you’re making infused chocolate is milk. Of course, you’ll need to infuse it by decarbing your weed first (do not skip this important and crucial part)
Let’s get rocking with cannabis chocolate, shall we? Let us know in the comments below which one was your favourite and if you enjoyed creating your own version of it!
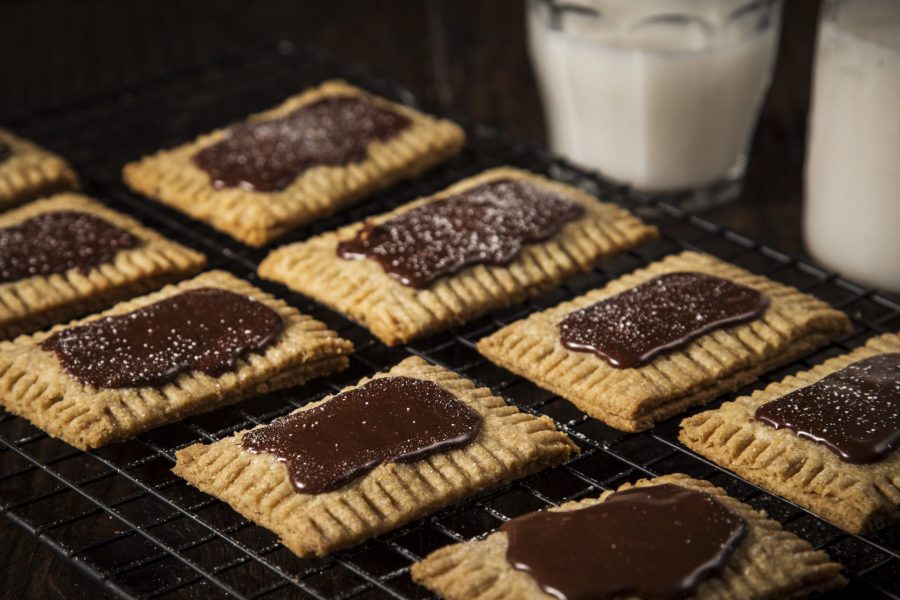
1. Fudge Chocolate Pastry Tarts
Just like pop tarts, but loaded with smooth chocolate that hugs the pastry in a cute little square – perfect for breakfast or any time of day.
Just like pop tarts you buy in the store, but SO MUCH BETTER!
Place the flour, cocoa powder, sugar, and salt into a large 8-cup capacity or higher food processor or, if you don’t have a food processor, in a large bowl. Pulse or whisk until combined.
Add cannabutter and pulse or use a pastry cutter to manually cut in until coarse pea-sized crumbs form. In 3 steps pour in the milk and pulse or stir after each addition. After all the milk is added, pulse or stir more until the dough clumps up and comes together. If it’s too dry, add 1 Tablespoon (15ml) of cold milk. Pour onto a work surface lightly dusted with cocoa powder or all-purpose flour. Use your hands to form dough into a ball. Divide the dough in half and flatten each into 1-inch thick discs. Wrap each disc tightly in plastic wrap and refrigerate for 2 hours.
FUDGE FILLING
The fudge filling needs to cool and thicken, so make it right after the dough. Place chocolate, milk, and sugar in a medium saucepan over medium heat. Stir frequently as chocolate melts and mixture combines. Once melted, remove from heat and stir in the cannabutter and vanilla extract. Pour into a heatproof bowl, cover, and set aside at room temperature to cool and thicken.
Line 1 large baking sheet with parchment paper or a silicone baking mat. Make sure there is enough room in your refrigerator for the baking sheet because the shaped pastry pop tarts must chill for 15 minutes before baking.
Remove 1 of the dough discs from the refrigerator and let it sit at room temperature for 10 minutes to slightly warm up because it will be quite solid. (Keep the other in the refrigerator until step 5.) Lightly dust a work surface, rolling pin, and your hands with cocoa powder or all-purpose flour. Using a rolling pin, roll the dough into a 9×12 inch rectangle. Trim the edges of the rectangle to straighten if needed. Cut rectangle into 3 equal strips and cut those into thirds for a total of 9 3×4 inch rectangles. Arrange the dough rectangles 2 inches apart on the prepared baking sheet and chill in the refrigerator as you roll out 2nd half of dough in the next step.
Roll out the 2nd half of dough and cut into 9 3×4 rectangles like you did with the 1st half of dough in step 4.
Remove 1st set of dough rectangles from the refrigerator. Using a pastry brush, brush edges of each of these 9 rectangles with egg wash. Spoon a heaping Tablespoon of filling into center of each. Lay the other set of pie dough rectangles on top of each and press your finger around the edges to slightly seal. Poke holes in the top pie crust with a fork or toothpick and then crimp with a fork.
Meanwhile, preheat oven to 375°F. Brush pastry tarts with egg wash and bake for 25-26 minutes or until edges appear set. Remove from the oven and allow pastries to cool for 5 minutes before transferring to a wire rack to cool completely.
In a medium saucepan over low heat or in a medium heatproof bowl using the microwave, warm butter and water together until butter has melted. Whisk mixture with the remaining icing ingredients. Cool icing for 15 minutes before spooning onto pastries. You can add the icing when the pastries are still warm, but again, they taste best after completely cooling.
A classic, yes – and one of the easiest, tastiest ways to enjoy weed.
These have been around for ages – but the best part as we learn, grow and develop recipes is that ‘back then’ they didn’t always decarb their weed – so you really never knew what kind of high you were going to get.
Now? With decarbing, you’ll enjoy a balanced high and the only surprise will be how tasty these brownies are!
Preheat oven to 330 degrees F (165 degrees C). Grease and flour an 8-inch square pan.
In a large saucepan, on very low heat melt 1/4 cup butter and 1/4 cannabis butter. Remove from heat, and stir in sugar, eggs, and 1 teaspoon vanilla. Beat in 1/3 cup cocoa, 1/2 cup flour, salt, and baking powder. Spread batter into prepared pan.
Bake in preheated oven for 25 to 30 minutes. Do not overcook.
To Make Frosting: Combine 3 tablespoons softened butter and 1 teaspoon cannabis butter, Add 3 tablespoons cocoa, honey, 1 teaspoon vanilla extract, and 1 cup confectioners’ sugar. Stir until smooth. Frost brownies while they are still warm.
Combine the oats and chickpeas in the bowl of a food processor and pulse until they are in small pieces. Add the cashew butter, maple syrup, cannabuter, and salt and process until it forms a smooth ball. Taste it to see if it’s sweet enough. If you want it sweeter, add sweetener and process until combined.
Line a baking sheet with parchment paper. Use a tablespoon to scoop level spoonfuls and then use your hands to roll the filling into a ball. Repeat with the rest of the filling. Place the baking sheet in the freezer and freeze for 1 hour.
Melt the chocolate chips in a small pot on low heat. One by one, drop one of the balls into the chocolate and use a spoon to completely cover it with chocolate, scoop it out and place back on the baking sheet. Let it cool at room temp for 5 minutes or more and enjoy!
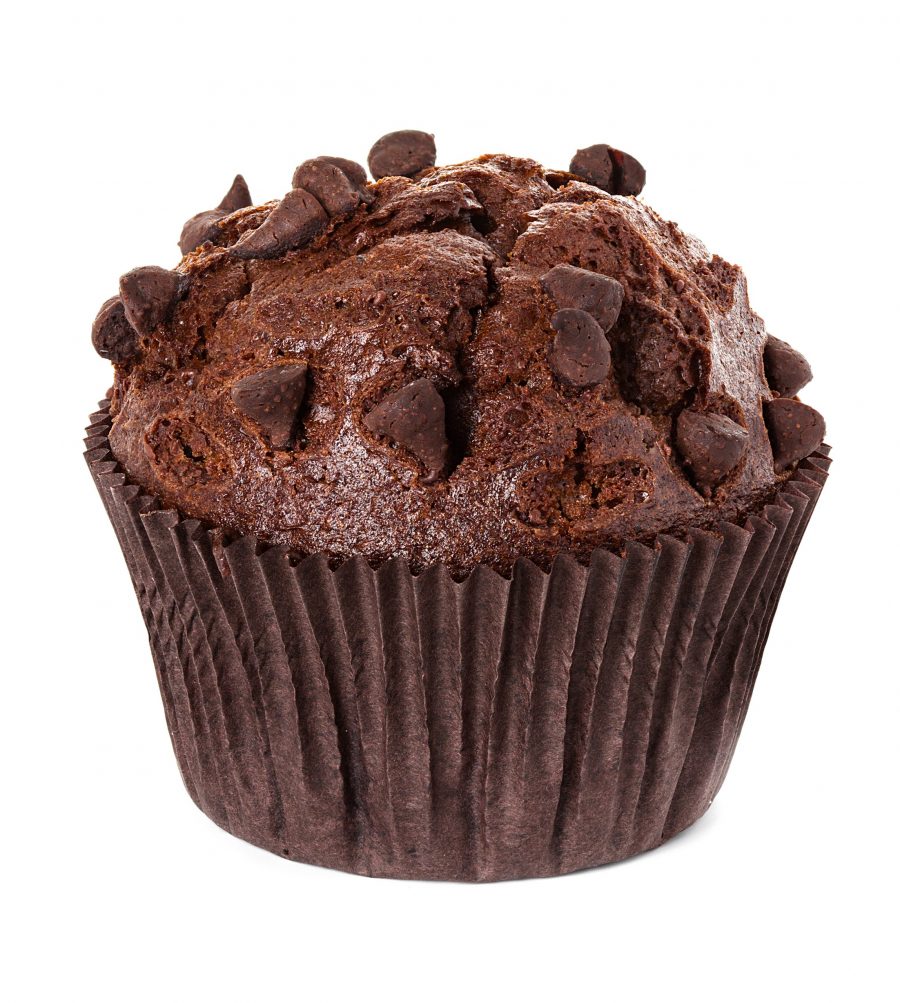
At first glance, these muffins do not look skinny! But we’re not trying to trick you, we’re just eliminating some of the fattier items, to make this a skinny muffin you’ll love!
Skimped on fats, but not on taste! You'll fall for these Skinny Chocolate Fudge Banana Weed Muffins infused with cannabis sugar.
1cupsemi sweet chocolate chipsplus more for topping if you like
Instructions
Preheat the oven to 375°F. Line a muffin tin with baking cups. Set aside. In a large bowl mash the bananas with a fork. Mash them very well – no big lumps.
Sift the flour, cocoa powder, salt, baking soda and baking powder into the wet ingredients. Lightly mix to combine. Fold in chocolate chips. The batter will be a little chunky
Divide the batter between the 12 muffin cups – fill them all the way to the top. Bake for 18-20 minutes or until a toothpick inserted into the middle comes out clean. Allow muffins to cool for 3 minutes, then transfer to a wire rack to cool completely.
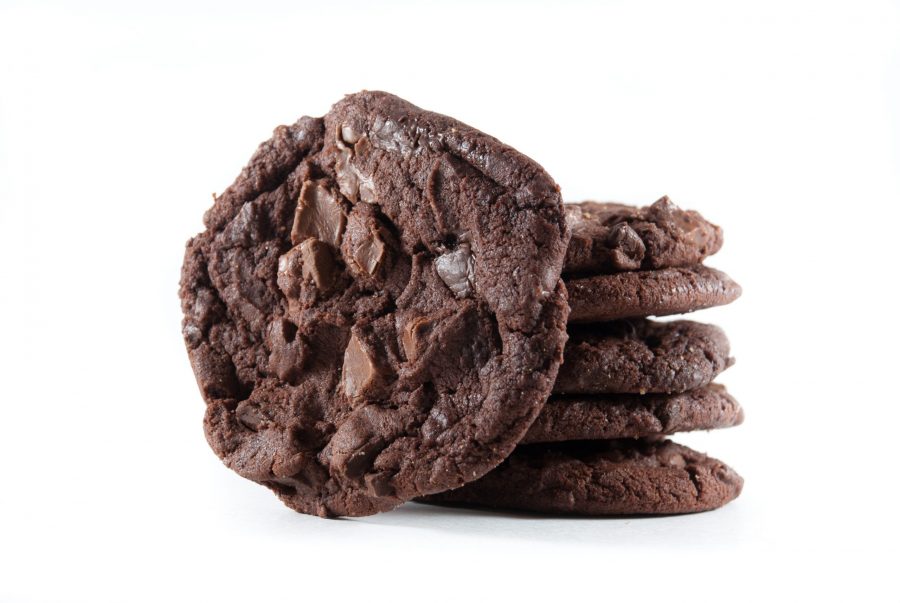
In a large bowl using a hand-held or stand mixer fitted with a paddle attachment, beat the butter, granulated sugar, and brown sugar together on medium high speed until fluffy and light in color. On high speed, beat in the egg and vanilla extract. Scrape down the sides and bottom of the bowl as needed.
In a separate bowl, whisk the flour, cocoa powder, baking soda and salt together until combined. With the mixer running on low speed, slowly pour into the wet ingredients. Beat on low until combined. The cookie dough will be quite thick. Switch to high speed and beat in the milk, then the white chocolate chips. The cookie dough will be sticky. Cover dough tightly with aluminum foil or plastic wrap and chill for at least 3 hours.
Remove cookie dough from the refrigerator and allow to sit at room temperature for 10 minutes. If the cookie dough chilled longer than 3 hours, let it sit at room temperature for about 20 minutes. This makes the chilled cookie dough easier to scoop and roll.
Preheat oven to 350°F (177°C). Line large baking sheets with parchment paper
Scoop and roll dough. Place on cookie sheet. Bake for 11-12 minutes. Allow for 5 minutes of cooling time out of the oven, and then press more chocolate chips on top.
And if you love how-to-videos, our YouTube channel has everything you need.
Share our post and comment below! We’d love to hear from you.
As always, happy canna-cooking and enjoy baking to get baked!
Steph Van De Ven
I am a prof writer/blogger & love my daily dose. I'm Canadian-Dutch, a horse owner, and love exploring new CBD & THC recipes, trends & products to share with you! #Cannadish